Why Tile Fails (And How to Prevent It)
Why Tile Fails (And How to Prevent It)

TL;DR:
Tile usually fails because of shortcuts in prep, bad waterproofing, or poor material choices. Learn the warning signs—and how to prevent costly repairs before they happen.
Intro: When Tile Cracks, So Does Trust
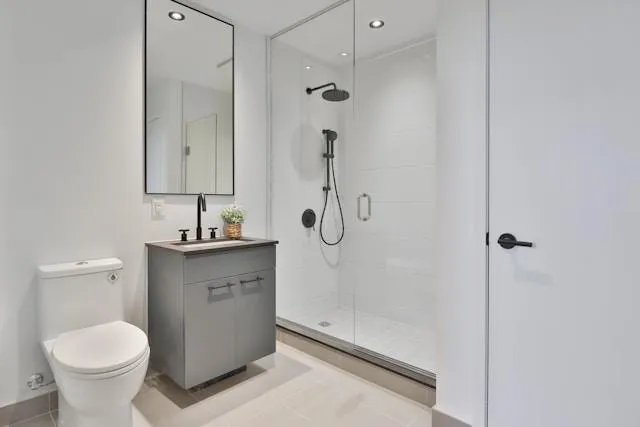
You step into your brand-new bathroom, only to find a tile has popped loose or a corner grout line is cracking already.
Frustrating? Definitely.
Preventable? Absolutely.
At Bower Tile, we’ve seen every kind of tile failure under the sun. Some of them take years to show up. Others happen fast—and hit your wallet even faster.
In this post, we’re going to break down:
Why tile fails (even from “pros”)
What you can do as a homeowner to prevent it
And what we do differently to make sure your investment lasts
Let’s get into it.
1. Lack of Proper Surface Prep
The #1 reason tile fails is poor prep work.
No matter how pretty the tile is, if it’s set over uneven, dirty, or unstable surfaces, it’s doomed to crack, pop, or fail.
Signs of Bad Surface Prep:
Hollow sounds when you tap on the tile
Uneven grout lines
Tiles that shift underfoot
How to Prevent It:
Make sure your installer checks for flatness, level, and structural integrity.
Insist on crack isolation membranes where needed.
For showers, demand proper mud float techniques or a fully supported backer board—not just foam board slapped on the wall.
2. Improper Waterproofing in Wet Areas
Waterproofing is non-negotiable, especially in showers.
Unfortunately, many installations rely on surface membranes or poorly sealed seams that don’t protect the substrate underneath.
We’ve torn out showers where water damage was hiding behind tile that looked fine.
What Can Go Wrong:
Mold and mildew behind the walls
Water seeping into surrounding rooms or subfloors
Complete shower failure within just a couple years
What to Look For:
Hot mop or properly installed waterproofing membranes with slope to drain
Flood testing before tile is installed
A clear plan for how water will flow and escape
Pro tip: If your tile installer skips a flood test or rushes waterproofing, it’s time to get a second opinion.

3. Cheap or Incorrect Mortar
Tile adhesive isn’t just glue—it’s the foundation of your install. And not all mortars are created equal.
We’ve seen beautiful porcelain tile peel up because someone used the wrong thinset or mixed it incorrectly.
How Mortar Can Fail You:
Too dry = poor bond
Too wet = extended cure time and weak adhesion
Wrong type = brittle cracks or tiles shifting
Prevent It By:
Asking what type of mortar is being used (modified vs. unmodified matters)
Ensuring they follow manufacturer specs for tile and substrate
Watching for proper mix technique and pot life
4. Movement Cracks and Expansion Joints
Tile is rigid. Houses are not.
Without room for movement, tile installations are bound to crack—especially in large areas or rooms with lots of temperature changes.
Look Out For:
Cracks that run across grout joints in a straight line
Cracking at the perimeter of a room
Loose tiles in the middle of an open space
Smart Prevention Tips:
Include expansion joints every 20–25 linear feet (or less in hot climates)
Use flexible caulking at changes in plane (like wall-to-floor or inside corners)
Install perimeter gaps and cover with trim
Even the best install can fail without a little room to breathe.
5. Grout Issues That Lead to Bigger Problems
Cracked, powdery, or stained grout isn’t just ugly—it’s a red flag that water or movement is compromising your installation.
Grout isn’t waterproof, but it’s your first line of defense. When it fails, trouble follows.
What Causes Grout to Fail:
Using the wrong type (sanded vs. unsanded vs. epoxy)
Poor mixing or installation
Movement underneath the tile
No sealer in high-moisture areas
What You Can Do:
Choose the right grout for the job
Reseal grout lines regularly in high-traffic or wet zones
Watch for early signs of wear or cracking
6. Using Foam and Speed Systems Without Long-Term Testing
We get it—some homeowners want fast results.
But many modern shower systems use lightweight foam or rapid set adhesives that don’t hold up over time, especially in multi-user households or rental properties.
We’ve repaired a ton of “quick installs” that failed in under 3 years.
Our Take:
If you’re investing thousands into a remodel, don’t skimp on traditional methods like cement float and hot mop.
These techniques have stood the test of time.
They take longer—but the durability is worth it.

How to Hire the Right Tile Installer (And Avoid the Wrong One)
Great tile work isn’t cheap. And cheap tile work isn’t great.
If you’re hiring a tile contractor, ask these questions:
Do you float your walls or floors, or just use foam boards?
What waterproofing system do you use?
How long do you expect the install to last without maintenance?
Can I see your flood test process?
Can you show me reviews or past installs from 5+ years ago?
If they squirm, hesitate, or give vague answers—that’s a sign to keep looking.
Final Thoughts: Invest Once, Cry Never
Most tile failures are caused by shortcuts, cheap materials, or lack of experience.
You don’t need to know every technical detail—but you do need a contractor who does.
When done right, tile is one of the most durable, beautiful, and low-maintenance surfaces you can invest in.
When done wrong, it’s a nightmare hiding behind pretty grout lines.

Why Bower Tile Cares
At Bower Tile, we believe a tile install should last longer than the trend it was inspired by.
That’s why we use time-tested methods like cement float pans, proper hot mop waterproofing, and high-quality materials—even when they take longer.
We don’t chase speed. We chase longevity, because we want your shower or floor to be the last thing you worry about.
We’re a family-run business, and we treat every project like it’s going in our own home.
Because one day, it might be.
